Showing posts with label dessert. Show all posts

Wednesday, November 2, 2011

Caramel Corn...so addicting!


Warning...this caramel corn is highly addictive!!  I've been making this recipe for a while now and when I get the ingredients out to make it, I immediately start drooling.  I crunchy, chewy and everything I love in caramel corn.  It makes a big recipe so it's perfect to take on a trip, or for a birthday party, or just to munch on over a weekend.  I made it last Saturday for my daughters soccer team, then made it again Monday night for a Halloween party.  It's fun and it's sure to please everyone...if not, there's more for you!

Caramel Corn {recipe adapted slightly from Paula Deen }


INGREDIENTS:

  • 2-3 bags microwave popcorn, popped {I use simply salted Orville Redenbacher's Natural}
  • 1 cup unsalted butter
  • 2 cups packed brown sugar
  • 1 tsp. salt
  • 1/2 cup light corn syrup
  • 1 tsp. baking soda
  • 1 tsp. vanilla extract
DIRECTIONS:
  Preheat oven to 200 degrees.  Spray a large baking pan or roaster with cooking spray.
Pop popcorn and pour into a large bowl.  I use a slotted spoon to scoop out any kernels that didn't pop.  
Over medium heat, combine butter, brown sugar, salt and corn syrup and boil for 5 minutes.  Remove from heat and stir in baking soda and vanilla extract.  Stir well.  Pour over the popped popcorn and stir well to coat.  Bake in sprayed baking pan for 1 hour, stirring every 15 minutes.  
Immediately pour into a large clean brown paper bag and shake.  Spread out on waxed paper to cool.  

Tuesday, October 18, 2011

Frosted Scotch Bars


My life is a whirlwind!!!  From soccer coach, to baseball fan, to president of Parent Teacher Organization, to mommy, to wife...wow, I'm exhausted just typing that out!  I rarely feel caught up at home anymore, mostly because I'm rarely home.  Yesterday although, I was home most of the day until it was time to pick up my kids.  It was nice.  I ran around the house from room to room trying to get as much done as I could.  I'm pretty satisfied with the results, but there's still so much more to do.  Oh well, I rewarded myself with these outrageously rich, but satisfying treats.  This is a recipe from a long time friend.  The kids adore these, but I have to give a disclaimer...cut them into small squares.  You'll thank me.  I took a big square for myself, ate it all in one minute, then got a major stomach ache.  My eyes were way bigger than my stomach!  But I just love the chocolate, peanut butter, butterscotch combination...nothing quite like it!  The chocolate layer is definitely more frosting-like, which I adore!


Frosted Scotch Bars {recipe by a dear friend}


INGREDIENTS:

  • 1 bag butterscotch chips
  • 1 1/2 cups creamy peanut butter 
  • 6 cups Rice Krispies cereal
  • 1 bag chocolate chips
  • 2 Tbsp. butter
  • evaporated milk {about 2-3 Tbsp.}
  • sifted powdered sugar {about 1/4 cup}
  • 1 Tbsp. vanilla
DIRECTIONS:
  Coat a 9 by 13 dish with cooking spray. 
 Melt together the butterscotch chips and peanut butter in a saucepan over low heat.  
Place rice krispies in a large bowl.  Once butterscotch/peanut butter mixture is melted, pour over the cereal and mix completely.  Place in the sprayed dish and press down with the back of a large spoon that is coated with butter {this helps keep it from sticking to the spoon}.  
Melt the chocolate chips and butter in a small saucepan over low heat.  Add the evaporated milk and the sifted powdered sugar.  Stir to combine.  The consistency should be creamy...if it isn't, add a little more evaporated milk.  Remove from heat and add vanilla extract.  
Spread over the top of the rice krispies in the pan and refrigerate for at least 30 minutes.  
I like them best cold, so I store them in the refrierator.  Pour a big glass of milk and enjoy!


Tuesday, August 30, 2011

Chewy Chocolate Chip Cookie Bars


It looks like we're finally getting down the back to school routine.  Funny how easily we settle back into our routines and honestly it's for the better!  Things run so much smoother in our home when the kids know what to expect and when they have little time for being bored or arguing with one another.
My early mornings are the hardest though...so thankful for strong coffee!

Here's a recipe I made from King Arthur Flour and I have to say, they were delicious, but I think I cooked them about 5 minutes too long.  I like the gooeyness of a cookie bar and I know if I had taken them out sooner they would have been gooey.  They were so good right out of the oven! Perfect with a big scoop of vanilla ice cream and some hot fudge on top :)

Chewy Chocolate Chip Cookie Bars {recipe adapted from King Arthur Flour }


INGREDIENTS: {Makes about 2 dozen bars}

  • 2/3 Cup butter
  • 1 1/2 Cups brown sugar, packed
  • 3/4 tsp. salt
  • 1 1/2 tsp. vanilla extract
  • 3 large eggs
  • 2 1/4 tsp. baking powder
  • 2 3/4 Cup All Purpose Unbleached Flour
  • 2 1/2 Cups chocolate chips
DIRECTIONS:
  Preheat oven to 350 degrees and lightly grease a 9 by 13 pan.  Melt the butter, and stir in the brown sugar.  Add the salt and vanilla, stirring until combined.  Allow the mixture to cool slightly, then add the eggs one at a time, beating well after each addition.  Scrape the bowl and sides halfway through.  
Add the baking powder and flour, stirring to combine.  Stir in the chocolate chips.  Scoop the batter into the prepared pan and, with a wet spatula, or wet fingertips, spread evenly to the edges.
The recipe says to bake for 30-32 minutes, but I suggest baking for 25-30 minutes or until they're risen and they're top is shiny and golden.  A cake tester won't necessarily come out clean, but let them sit in the pan until they are almost cool, then cut and serve.  

Thursday, August 4, 2011

Fresh Boysenberry Cobbler


Not sure if I've mentioned it before, but I have a friend who grows the most amazing boysenberries I have ever seen!  They are HUGE and have the most wonderful flavor...my hands-down favorite berries are these boysenberries!  I took the kids out last week and picked a couple basket-fulls of these delicious berries, with the intent of making a cobbler.  The kids had their fair share as we were picking, probably like one for the basket and 4 for them!
Usually when I make a cobbler I use more of a pie crust type topping, but this time I searched some recipes and decided to go with more of a biscuity-type topping.  This recipe came from Williams-Sonoma and it was pretty simple.  We all enjoyed our big servings of cobbler with a nice big scoop of vanilla ice cream.  I'm actually looking forward to some more today for a mid-morning snack!  Also, I would suggest using this topping with any kind of fruit...peaches, apricots, or apples too.


Fresh Boysenberry Cobbler {recipe slightly adapted from Williams-Sonoma}


INGREDIENTS: {serves 8}
  • 2 lbs. fresh boysenberries, or any other mixed berries
  • 2 Tbsp. orange juice
  • 1/2 cup plus 3 Tbsp. sugar {use less sugar if your berries are really sweet...I used 1/4 cup sugar}
  • 2 Tbsp. cornstarch
  • 1/2 tsp. ground cinnamon
For the Cobbler topping:
  • 2 1/4 Cups unbleached all-purpose flour
  • 1/2 Cup firmly packed brown sugar
  • 2 tsp. baking powder
  • 1 tsp. salt
  • 1 tsp. baking soda
  • 6 Tbsp. chilled unsalted butter, cut into 1/2 inch pieces
  • 1 egg
  • 3/4 cup half & half {or heavy cream}
DIRECTIONS:
Preheat oven to 375 degrees.  Lightly butter a 9 by 13 baking dish.  I used an oval dish.  
In a bowl, combine the berries, juice, 1/2 cup sugar, cornstarch, and cinnamon.  Gently toss to combine and pour into the prepared baking dish.
To make the topping in a food processor, combine the flour, brown sugar, baking powder, salt, and baking soda, and pulse briefly to mix.  Add the butter and pulse until the mixture resembles coarse meal. In a small bowl, whisk the egg and cream together.  Pour the egg mixture in the processor and pulse just until the topping holds together.  
Using a large spoon, place dollops of topping evenly over the berries.  Sprinkle the 3 Tbsp. sugar over the topping.  Place the dish on a rimmed baking sheet.  Bake the cobbler until the top is golden and the berry filling is bubbly; about 35 minutes.  Transfer to a wire rack and let cool for 10-15 minutes.  Using a large spoon, scoop cobbler onto individual plates and serve with a big scoop of vanilla ice cream!


Monday, April 4, 2011

Lemon Ricotta Pound Cakes


I'm always in the mood for something sweet and lemony.  After being super sick for the past week, my appetite has been really poor.  I mean, for the girl who loves to eat, I've been getting by on toast and water to sustain me.  Don't get me wrong, my appetite is definitely coming back, but only little by little.  And honestly right now sweet things are the most appealing.  So, I came across a Barefoot Contessa Orange Pound cake recipe in my cookbook and decided to tweak it a bit.  I substituted lemon for the orange and ricotta cheese for the buttermilk.  It turned out great and I'll for sure make it again!  We ate one of the pound cakes with sliced strawberries and ice cream then a couple of days later I made a trifle out of the second pound cake.

Lemon Ricotta Pound Cakes {recipe adapted from Barefoot Contessa's Orange Pound Cake}


INGREDIENTS:

  • 2 sticks butter, at room temperature
  • 2 cups granulated sugar { I used 1 3/4 cup sugar}
  • 4 extra large eggs, at room temperature
  • 1/4 cup grated lemon zest {4-5 lemons}
  • 3 cups all-purpose flour
  • 1/2 tsp. baking powder
  • 1/2 tsp. baking soda
  • 3/4 tsp. kosher salt
  • 1/4 cup freshly squeezed lemon juice
  • 3/4 cup whole milk ricotta cheese
  • 1 tsp. vanilla extract
Glaze for the loaf
  • 1 1/2 cups confectioners' sugar, sifted
  • 2-3 Tbsp. freshly squeezed lemon juice
DIRECTIONS:
  Heat the oven to 350 degrees.  Grease and flour two 8 by 4 inch loaf pans.  By greasing and flouring the pans it will ensure that the loaves pop out of the pans very easily.  
Cream the butter and sugar in the bowl of an electric mixer for about 5 minutes, or until light and fluffy.  Beat in the eggs, one at a time, and the lemon zest.  Add the ricotta, lemon juice, and vanilla, beating thoroughly.
In a large bowl, whisk together the flour, baking powder, baking soda, and salt.  Add the flour mixture 1 cup at a time being careful not to over beat.  Divide the batter evenly between the pans and bake for 45 to 55 minutes, until a cake tester comes out clean.  
When the cakes are done, let them cool for 10 minutes.  Take them out of the pans and place them on a baking sheet set over a tray.  Allow the cakes to cool completely before glazing.
To glaze:  Combine the confectioners' sugar and lemon juice in a bowl, mixing with a wire whisk until smooth.  Add a few more drops of juice, if necessary, to make it pour easily.  Pour over the top of the cakes and allow the glaze to dry.  I wrapped mine loosely in foil and they lasted for 3 days.  


Saturday, February 19, 2011

French Lemon Cream Tart...Yep it's amazing!!


Once again, the citrus is ruling my kitchen right now!  I'm trying to make the best use of the HUGE bag my mom gave me of lemons, limes, and oranges.  The kids are eating up the oranges like crazy, so that leaves lemons and limes of abundance!  
I've been eyeing this recipe for a few weeks now and figured I'd take the time to make it on Valentines Day.  The lemon cream filling is absolutely worth every minute spent stirring...trust me!  The shortbread-like crust looks very crumbly, but don't worry, with all of the butter in the crust, it comes together very nicely.  I especially liked the pat-in-the-pan style!  Next time I make this I may actually try a graham cracker crust.  Oh, and don't forget to make some whipped cream to go on top!  

THE MOST EXTRAORDINARY FRENCH LEMON CREAM TART
**Be sure to plan for refrigerating time of the cream and the dough**

Recipe adapted from Ezra Pound Cake  
Original recipe by Dori Greenspan "Baking: From My Home to Yours"

INGREDIENTS:
  • 1 cup sugar
  • grated zest of 3 lemons
  • 4 large eggs
  • 3/4 cup fresh lemon juice {from 4-5 lemons}
  • 2 sticks plus 5 tablespoons {10 1/2 ounces} unsalted butter, cut into Tbsp. size pieces, room temp.
  • 1 9-inch tart shell made with Sweet Tart Dough, fully baked and cooled {recipe below}
DIRECTIONS:

1.  Have an instant read thermometer, a strainer, and a blender at hand.  Bring a few inches of water to a simmer in the bottom of a double boiler or a regular saucepan.
2.  Put the sugar and zest in the top of a double boiler OR a large heatproof bowl that can be set over the pan of simmering water.  Off the heat, rub the sugar and zest between your fingers until the sugar is moist, grainy and very aromatic.
3.  Whisk in the eggs, followed by the lemon juice.  Set the bowl over the pan and whisk until the cream reaches 180 degrees F.  It will start to thicken and the whisk will leave tracks.  Getting to temp can take as long as 10 minutes.  {Mine stayed at 160 degrees for a while before it started climbing...be patient}
4.  Remove the cream from the heat and strain it into the blender; discard the zest in the strainer.  Check the temp of the cream again...you want it to be about 140 degrees.  
5.  Turn the blender to high and, with the machine going, add the butter about 5 pieces at a time.  Keep the machine going for another 3 minutes.  The cream will be nice and thick at this point.
6.  Pour the cream into a container, press a piece of plastic wrap against the surface to create an airtight seal and refrigerate for at least 4 hours or overnight.  
7.  To assemble the tart, whisk the cream to loosen it and spoon it into the tart shell.
**Refrigerate the assembled tart if not serving right away***

SWEET TART DOUGH

INGREDIENTS:
  • 1-1/2 cups all-purpose flour
  • 1/2 cup confectioner's sugar
  • 1/2 tsp. salt
  • 1 stick, plus 1 Tbsp. {9 tablespoons} very cold {or frozen} unsalted butter, cut into small pieces
  • 1 large egg yolk
DIRECTIONS:
1.  Put the flour, confectioner's sugar and salt in a food processor and pulse to combine {you can definitely do this by hand too}.  Add the butter and pulse until the butter is coarsely cut in-you should have some pieces the size of oatmeal flakes and some the size or peas.  Stir the yolk, and add it a little at a time, processing in long pulses, until the dough forms clumps.  Turn the dough out onto a work surface and, very lightly, knead the dough just to incorporate any dry ingredients.  
2.  Butter a 9-inch fluted tart pan with a removable bottom {I didn't have one, so I used a 9-inch pie pan}.  Whatever works!  Press the dough evenly over the bottom and up the sides of the pan. Freeze the crust for at least 30 minutes before baking.
3.  Preheat the oven to 375 degrees F.  Butter the shiny side of a piece of aluminum foil and fit the foil, buttered side down, tightly against the crust.  Put the tart pan on a baking sheet and bake the crust for 25 minutes.  Carefully removed the foil.  {If the crust has puffed, press it down with the back of a spoon}.  bake for another 8-10 minutes, or longer, until it is firm and golden brown.  Transfer the tart pan to a rack and cool the crust completely before filling.  

Ingredients for the lemon cream...don't be afraid of the butter!

Look at my little worker bee

I LOVE my new juicer!!

baked tart shell...I didn't have a tart pan, so I used my pie pan

Oh, this cream is soooo incredibly good!  

Finished product...not too shabby

Friday, January 21, 2011

Zucchini Cupcakes with Maple Cream Cheese Frosting


I really like trader joe's for a lot of things, but sometimes I just want to buy one jalapeno or two zucchinis...not six!  They've actually started selling a lot more "single" items, like tomatoes and bell peppers, but when it comes to some things, they still sell bulk.  Which brings me to my abundance of zucchini and what to do with it.  I came across this recipe the other day and honestly, it was the frosting that sold me!  I mean come on, what doesn't taste good with cream cheese frosting slathered on it?
Two out of my three kids ate them up no problem.  They are really good fresh out of the oven even without the frosting...

Zucchini Cupcakes {slightly adapted from here}


INGREDIENTS:

  • 1 1/2 cups all-purpose flour
  • 1/2 tsp. salt
  • 1/2 tsp. baking soda
  • 1 1/2 tsp. cinnamon
  • 1/2 cup granulated sugar
  • 1/2 cup brown sugar
  • 1 stick unsalted butter, melted
  • 2 eggs, room temp.
  • 1 tsp. pure vanilla extract
  • 1/4 cup plain yogurt
  • 1 cup zucchini, finely grated
1.  Pre-heat oven to 325 degrees.  Line a standard size muffin pan with 12 paper liners.  In a medium bowl, whisk together flour, baking soda, salt, and cinnamon.  Set aside.  In a large bowl, whisk together the sugars and butter.  Add in eggs, one at a time incorporating well after each addition.  Stir in vanilla, yogurt and zucchini.
2.  Fold dry ingredients into the zucchini mixture, and divide evenly among muffin liners.  Bake for 20-25 minutes, or until a toothpick inserted in the center comes out clean.  Let cupcakes cool in pan for about 10 minutes, then remove to wire rack.  

Maple Cream Cheese Frosting:
  • 1 stick unsalted butter, at room temp.
  • 8 ounces cram cheese, at room temp.
  • 2 cups organic powdered sugar {It actually has a nice maple flavor to it}
  • 3 Tbsp. pure maple syrup
  • 1 tsp. pure vanilla extract
Mix all ingredients together with an electric mixer until smooth.  Makes a nice amount of frosting, so be sure to refrigerate any leftovers!

Tuesday, December 7, 2010

Chocolate Espresso Cakes


Chocolate Espresso Cakes {Sunset Dec. 2010}

Make these cute little cakes for your next Christmas party and you'll be glad you did!
I found these baking molds at Michael's Craft store.  They come in many different colors...


INGREDIENTS: {Makes 12 cakes}

  • 1 12/ cups sugar
  • 1 cup buttermilk
  • 1/2 cup brewed coffee, cooled
  • 3/4 cup vegetable oil
  • 2 large eggs, at room temperature
  • 1/2 tsp. salt
  • 1 tsp. vanilla extract
  • 2 cups flour
  • About 1/2 cup unsweetened cocoa powder
  • 1/4 cup espresso powder
  • 2 tsp. baking soda
  • 1 tsp. baking powder
  • 6 oz. semisweet chocolate chunks or chips
  • 4 oz. bittersweet (or semisweet) chocolate, chopped
  • 1/2 cup whipping cream
DIRECTIONS:
1. Preheat oven to 350 degrees. In a bowl with a mixer, beat sugar, buttermilk, coffee, oil, eggs, salt, and vanilla on medium speed until well blended.
2. Whisk together flour, 1/2 cup cocoa powder, espresso powder, baking soda, and baking powder in a bowl to blend.  Gradually add to wet mixture; beat on medium speed until smooth, scraping down sides as necessary.  Stir in semisweet chocolate chunks.
3.  Set baking molds on a rimmed baking pan and fill each about two-thrids full.  Bake until a toothpick inserted in centers (avoiding chocolate chunks) comes out clean, about 27 minutes.  Cool cakes completely on a rack.
4.  Melt bittersweet chocolate with cream in a small saucepan over very low heat and stir with a rubber spatula until smooth and blended.  Remove from heat and let cool until thick but still spreadable, about 30-40 minutes.  Spread on cakes.  Dust cakes with cocoa.  Let frosting firm up completely before serving, at least 30 minutes.  

Monday, August 30, 2010

A Piece of My Heart...And an Ice Cream Treat


School officially began today!! I sent off my three kiddos...AND a piece of my heart!


Ella is a BIG girl now as she begins Kindergarten! Honestly, I can't even believe that I officially have no more kids at home. It's strange, but exciting in many ways! For the past 9 years I've had at least one, two or three of my kids home with me and now that they are all in school, I'm a little shell-shocked! Of course I have a plan...STAY BUSY! But I also want to take time to just wait and find rest in the Lord and see how He is going to use me this year. I'll miss my one on one time with Ella, but I know she's in good hands AND she has her 2 BIG brothers watching over her!

Go get em Ella!!

So every year since school started for them, I like to surprise them with a little treat. Sometimes it's cupcakes, one year it was a pencil cake and THIS year it's:

ICE CREAM SANDWICHES

Such a treat!!!
Honestly the easiest dessert to make AND if you want to, there are ways to make it even easier! I went to Panera and got some of their HUGE chocolate chip cookies and bought some vanilla ice cream, then looked in my pantry for sprinkles (which I always have a ton of).

INGREDIENTS: Makes 3
  • 6 Large Chocolate Chip Cookies (or ANY flavor you like)
  • Your favorite half gallon of ice cream, softened (I used Vanilla)
  • Sprinkles
DIRECTIONS:
Let Ice cream soften for at least 20 minutes. Spread the sprinkles out in a large pie plate and set aside. Lay out cookies, bottom side up on a parchment lined cookie sheet. Place one LARGE scoop of ice cream on the center of 3 cookies, then GENTLY press the other cookie on top. Once the cookies are "sandwiched", roll them in the sprinkles. If the sprinkles aren't sticking, you can grab a handful and sprinkle them on yourself. Immediately place in the freezer until ice cream hardens back up.

Saturday, August 28, 2010

Raspberry Bars


We love raspberry jam! We usually eat it on sourdough toast in the morning for breakfast, but lately I've been thinking about doing more with that raspberry jam then just spreading it on toast. So, I browsed some recipes the other day, but ended up making up one of my own. Not that this same thing hasn't been made before, but I figured I'd base the recipe on that crumbly topping you make for a fruit crisp. Nothing compares to that buttery, crispy topping!
So, I got out what I had in the pantry (which is why I like this kind of recipe) and went to work.
They smelled soooo good while they were baking and they're WAY too hot to eat right out of the oven...trust me, I tried and I burned my tongue!

Truth be told, I made these on Saturday night so we could grab them on our way to church Sunday morning. They may not be the "healthiest" breakfast, but they do have oats AND whole wheat flour! Make these bars the day or evening before, let them cool then cut into squares and grab one in the morning for breakfast or pack them as a snack for your kiddos!

Raspberry Bars

INGREDIENTS:
  • 1/2 cup whole wheat flour
  • 1/2 cup all-purpose flour
  • 1 3/4 cup old fashioned oats
  • 3/4 cup brown sugar, packed
  • 3/4 cup (1 1/2 sticks) cold unsalted butter, cut in 1 in. cubes
  • 1/2 tsp. kosher salt
  • 1/2 tsp. cinnamon
  • 1 jar (13 oz) Raspberry Jam (I used Bonne Maman Brand)
DIRECTIONS:
Pre-heat oven to 375 degrees. Line a 9 by 13 in. pan with parchment paper, allowing sides to hang over (to easily lift out bars). Butter parchment paper then set aside. Measure ingredients and in a large food processor add flour, oats, brown sugar, salt & cinnamon. Pulse until combined then add in butter cubes; Pulse until small crumbs form.
Set aside 1 1/2 cups crumb mixture. Dump remaining crumb mixture onto bottom of buttered 9 by 13 pan. Press lightly. Open jam jar and heat in microwave for 20 seconds, just to soften the jam a little. Pour the jam onto the bottom crumb mixture and spread evenly. Sprinkle remaining 1 1/2 cup crumb mix on top of jam. Bake in pre-heated oven for 20-25 min. Let cool completely in pan then lift out of pan using the extended parchment paper and place on cutting board. Cut into squares.

Monday, August 16, 2010

Strawberry Genoise with Whipped Cream


Ok, so your probably thinking "what in the heck is a genoise?" Well, I wasn't too sure myself until I started browsing through my Joy of Cooking cookbook the other day. I was looking for a cake to make and of course, I stumbled upon this one!
JOY of COOKING describes it as: "a rich, moist cake of Italian origin...excellent with fruit fillings and as a roll cake with cream fillings". Don't be afraid by all of the whipping & beating of the eggs...it really wasn't that bad. I had a lot of fun with this recipe and it turned out really yummy! I knew I wanted to use whipped cream, strawberries and lemon curd as my topping, so I sort of muddled my way through the filling/topping part. Not too shabby...

INGREDIENTS & DIRECTIONS for CAKE: Cake recipe from JOY of COOKING
(Makes two 9 inch. layers)

*Have all ingredients at room temp. Pre-heat oven to 350 degrees. Line 2 cake pans (9 in.) with parchment or wax paper. This (i've found) is one of the only ways my cake will release from the pan perfectly every time!

Pretty simple ingredients
Sift together 3 times and return to sifter:
  • 1 1/4 cups cake flour, sifted
  • 1/4 cup sugar
Melt in saucepan:
  • 1/3 cup (5 1/3 Tbsp.) unsalted butter
Set aside. Whisk together in a large heatproof bowl:
  • 6 large eggs (room temp.)
  • 3/4 cup sugar
**Set the heatproof bowl in a skillet of barely simmering water and whisk constantly until the mixture is warm to the touch. Remove the bowl from the heat and beat on high speed until the mixture is lemony-colored and has tripled in volume. *About 5 minutes in a heavy-duty mixer with the whisk attachment, 10-15 minutes with a hand-held mixer.

Whisking like crazy!
In 3 additions, sift the flour mixture over the top and fold in very gently with a rubber spatula. Re-heat the butter until it is hot and transfer to a medium bowl. Fold about 1 1/2 cups of the egg mixture into the butter until completely incorporated, along with: 1 tsp. Vanilla.
Srape mixture onto the remaining egg mixture and fold in. Scrape the batter into the pans and spread evenly.
Bake until cake begins to pull away from the sides of the pans and the top springs back when lightly pressed, about 15 minutes. Let cool in the pans on a rack for 10 mites. Slide a thin knife around edges to loosen from pan, inver the cake and remove the paper liners. Let cool right side up on the rack.

For the Filling:
  • 3 cups strawberries, cut into 1/2 inch slices. **save some for garnish
  • 2 cups heavy cream
  • 2 tsp. powdered sugar
  • 1 jar lemon curd (I found this at Trader Joe's)
**Whip the cream and sugar in a heavy-duty mixer with a whisk attachment until soft peaks form. Place the strawberries in a bowl. Fold about 3/4 of the cream into the berries. Place bottom cake layer on a serving plate. Spread a generous even layer of lemon curd on bottom cake layer. Arrange sliced strawberries around the outer edge of the cake, on top of the lemon curd, then spread the whipped cream with the strawberries in the center of the cake.
Place the top layer on and top with remaining whipped cream and strawberries.
I didn't frost the sides of the cake, but feel free to do so with the leftover whipped cream!

This was my bottom layer...
My little piece of Italy

Saturday, July 3, 2010

Rustic Boysenberry Tart


Oh my goodness...I've been in heaven with these sweet and juicy berries!!! A good friend was generous to share their crop of Boysenberries and I jumped at the chance to buy a flat. Although, I'm thinking I was crazy to buy just one and not two flats! I loved boysenberries as a kid, partly because they are so incredibly addicting and partly because I knew it meant summer...oh yea!! It's been really hard to find them since we've moved to the Central Coast and honestly, blackberries just aren't as flavorful (to me).
So, the afternoon I got them, I took out a little basket to wash and suddenly I had 3 little ones and a husband all with arms reaching into the sink to grab some berries! I knew these would go fast! My plan though, was to make a cobbler or crisp or pie. Well, I went the "easier" route and settled on a rustic tart. The beauty of the rustic tart is that it's a "free form" pie, so perfection isn't necessary! Yay for me and those who cringe at the thought of the perfect pie crust! Just plop the filling on the rolled out dough, then fold up the sides of the dough, brush with some egg wash and in the oven it goes!! Oh, and I splurged and made homemade vanilla-bean ice cream to go alongside...I just love summer! Don't you want to go out and find some boysenberries now??

The dough recipe came from Joy of Cooking and I kind of made up my own filling recipe.

DOUGH INGREDIENTS:
  • 1 Cup all-purpose flour
  • 2 Tbsp. sugar
  • 1/2 tsp. salt
  • 6 Tbsp. (3/4) stick unsalted butter
  • 1 large egg yolk, lightly beaten
  • 1 Tbsp. fresh lemon juice
  • 1/2 tsp. vanilla
DIRECTIONS FOR DOUGH:
1. Whisk together flour, sugar and salt in a bowl. Cut butter into the flour mixture using a pastry blender or your handy little fingers.
2. Make a well in the center of the crumbs and add the yolk, lemon juice and vanilla. Stir with your fingers until the dough comes together. Shape into a disk, wrap in plastic, and refrigerate for at least 30 minutes. Roll to make a 9 1/2 inch - 10 inch circle. **Don't worry about keeping the edges from breaking...that's what makes it rustic!!
3. Line with parchment paper an edged baking sheet. Carefully place rolled out dough onto baking sheet. Pile fruit onto the center of the dough and carefully fold up edges around the fruit.
***Whisk up one egg yolk with 1 Tbsp. water. Brush the egg-wash over the outside edges of dough and sprinkle with Raw Sugar. Bake @ 350 degrees for 35-40 minutes, or until golden brown. Cool on rack; serve warm with vanilla ice cream!

FRUIT FILLING:
  • 5 Cups fresh Boysenberries (you can really use any fruit for this recipe)
  • 1/2 - 3/4 Cup sugar, depending on how sweet your fruit is.
  • 1/4 Cup flour
  • 1 Tbsp. juice from an orange (optional)
**Carefully mix all ingredients together and let sit for 15 minutes.

Boysenberries...need I say more?
The nice thing about a "rustic" tart is that it doesn't have to look pretty

All wrapped up, just waiting for an egg wash and a sprinkle of Raw Sugar

Monday, June 14, 2010

Peach, Apricot, Mixed Berry Crisp


Ahhh, the sweet smells of summer-time! There's nothing like super ripe juicy peaches, bright red sweet berries and the smell of a buttery crisp baking in the oven! I LOVE experimenting with crisps, cobblers & pies! The fun thing about them is that you don't have to stick to any particular recipe, you can use any combination of fruit that you like & it always turns out amazing with that crispy, buttery topping! This particular combination turned out so good because the fruit was so ripe & sweet on it's own that I didn't have to add much sugar at all. I followed Ina Garten's recipeHERE, but tweaked a few things. So go ahead and make a crisp this summer and don't let that crisp topping turn you away....it's summer after all!!


INGREDIENTS for FILLING:
  • 5 peaches, sliced in thick wedges
  • 4 apricots, sliced in thick wedges
  • 1 pint raspberries
  • 1 pint blackberries
  • 1/2 pint blueberries
  • 1/2 cup sugar (or more if fruit is tart)
  • 3 Tbsp. flour
  • juice squeezed from 1 orange
INGREDIENTS for TOPPING:
  • 1 1/2 Cup flour (you can use whole wheat flour too)
  • 1 Cup sugar
  • 1/2 Cup brown sugar
  • 1/4 tsp. salt
  • 1 Cup Oatmeal (I used old fashioned, but you can use quick also)
  • 1/2 lb (yes 2 STICKS) unsalted butter, diced
DIRECTIONS:
Heat oven to 350 degrees and spray or butter a 9 by 13 rectangle or oval baking dish. Set aside. Combine all of the filling ingredients, stirring the flour and sugar in carefully so you don't break apart the berries. Place the fruit in the pan. Combine the topping ingredients in the bowl of an electric mixer fitted with a paddle attachment. If you don't have one, then you can use a fork or your trusty hands to mix. Mix on low speed until butter is pea-sized and mixture is crumbly. Sprinkle evenly over fruit and bake for 1 hour, until top is browned and the crisp is bubbly. Serve WARM...with a scoop of vanilla ice cream of course!!

Crispy topping and bubbly fruit!

My little helper piling on the topping...

Thursday, May 13, 2010

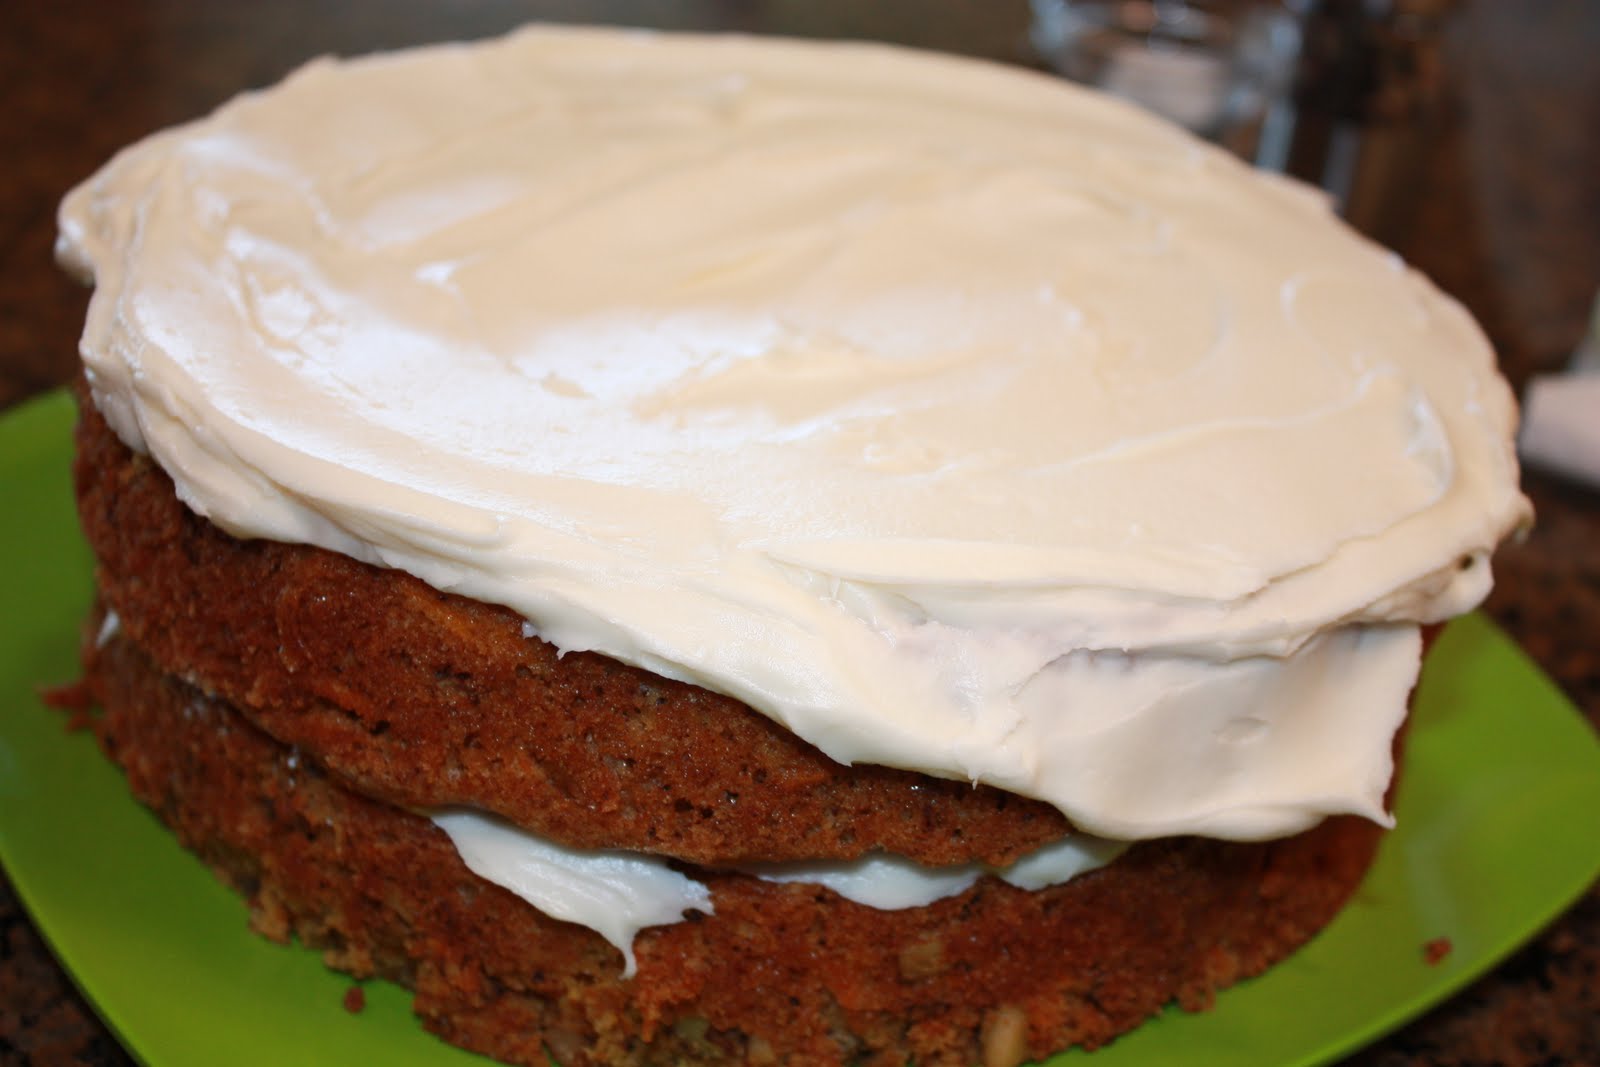
CARROT CAKE


This has got to be THE MOST requested cake ever! It's a popular birthday cake with my friends and I love making it! I mean come on, you've got your healthy veggies, your nuts, your dairy...how can you resist? Well, this cake smells amazing when it's baking, tastes even more amazing and makes for the BEST leftovers!

CARROT CAKE
Ingredients
  • 2 C. all-purpose flour
  • 1 tsp baking soda
  • 3 tsp. baking powder
  • 2 tsp. cinnamon
  • 1 tsp. salt
  • 4 eggs
  • 1 1/4 C. Oil (I can never bring myself to use that much, so I use half applesauce, half oil) You'd seriously NEVER know!
  • 1 tsp. vanilla - sometimes I add a splash more :)
  • 1 3/4 C. sugar
  • 3 C. grated carrots
  • 1 C. chopped walnuts (optional)
Cream Cheese Frosting
  • 1 lb. box powdered sugar, sifted
  • 1 8 oz. pkg. cream cheese, room temp.
  • 1 cube butter, room temp.
  • 1 tsp. vanilla
Directions: Prepare two 9 inch round pans by wiping the bottom and sides with butter, then flour to coat. This cake is SUPER moist, so if you have Parchment Paper, cut 2 rounds to place on the bottom of the pan after you grease and flour...it will help tremendously with removing the cake after it's cool.
Mix flour, baking soda, baking powder, cinnamon and salt in medium bowl. In a large mixing bowl, combine over medium-low speed, eggs, oil, vanilla. Add sugar to combine. On low speed, add flour mixture 1 cup at a time. Turn off mixer then stir in carrots and nuts. Divide mixture evenly among the two cake pans.
Bake in pre-heated 300 degree oven for 45 minutes or until toothpick comes out clean. Allow to cool for at least 20 minutes in the pan, then turn out onto rack. Frost with Cream Cheese Frosting and ENJOY!!!!

The batter: Sweet Carrots from Farmers Market

The BEST frosting EVER!!!!


Do I eat the rest of the frosting or do I finish the cake?

LinkWithin

Related Posts with Thumbnails