Saturday, February 26, 2011

Saturday Morning Biscuits


Breakfast has always been my favorite meal of the day.  I love the smell of bacon cooking, coffee brewing, and toast in the toaster.  This isn't always a reality in our home, but I do love it when we have a Saturday morning that I can get up and cook a big breakfast for my family.  Actually, what I really love is going out to breakfast, but cooking at home is usually a cheaper option!
This morning I decided on biscuits.  My son adores a good biscuit and he is always asking me to make them.  This recipe came from my tried and true cookbook JOY OF COOKING.  It's an easy recipe and produces a nice fluffy biscuit...absolutely delicious with some raspberry jam!  The one thing I liked about this recipe is that you don't need buttermilk, which I rarely have.  Be sure to handle the dough carefully, not pressing down hard when you roll it out.  Also, when using a biscuit cutter, be sure not to twist the cutter.  Just make one cut nice firm cut without twisting.

Rolled Biscuits {makes 10 biscuits}


INGREDIENTS:
  • 1-3/4 cups all-purpose flour
  • 1 Tbsp. baking powder
  • 1/2 tsp. salt
  • 1 Tbsp. sugar
  • 6 Tbsp. chilled butter, cut into small chunks
  • 3/4 cup milk
  • melted butter to brush on biscuits before and after the bake
DIRECTIONS: 
Preheat oven to 450 degrees.
Be sure to sift flour, baking powder, salt, and sugar together in a large bowl.  This really is a necessary step to be sure all of those ingredients are incorporated well.  Cut in the butter, using a pastry blender or your hands, until the size of small peas.  Make a well in the center and pour in all of the milk.  Stir just until the dough comes away from the sides of the bowl.  Turn the dough out onto a lightly floured board.  Knead GENTLY and quickly, about 8 to 10 times.  Roll out with a lightly floured rolling pin, to between 1/4 to 1/2 inch thick.  *I rolled mine to to 1/2 inch thick just to be sure I was going to get a nice tall biscuit.  Cut with a 2-3 inch biscuit cutter and place with sides touching on an ungreased baking sheet.  Brush tops with melted butter.  Bake until lightly browned, 12-15 minutes.  Brush with remaining melted butter and serve warm!
**To re-roll scraps, just use your hand to gently pat out dough.  I was able to use up all of my scraps in order to get 10 biscuits.**

Monday, February 21, 2011

Stuffed Baked Potatoes


In trying to pull off dinner the other night, with very little to work with, I decided to stuff some baked potatoes.  Ever have one of those nights?  I do...very often!  Either I'm not in the mood to think of what to make or I just haven't been to the grocery store, so our options are limited.
Thankfully my sweet husband is NOT picky and he doesn't mind a good old sandwich or top ramen when I'm in a pinch.  Well, the baked potatoes actually worked really well and I'm not too sure why I haven't made them before.  I mean, stuffing a potato with cheese and broccoli and chicken...that's just one of the endless possibilities!  You could stuff any sort of combination of veggies to make a really great meal.  And honestly, it was a really satisfying meal!


Chicken, Broccoli, Cheddar Stuffed Potato {serves 2}


INGREDIENTS:

  • 2 large russet or baking potato
  • olive oil
  • coarse salt
  • 2 Tbsp. butter
  • 1/4 cup sour cream or plain yogurt
  • 1/2 cup sharp cheddar cheese, shredded
  • 1-2 chicken breasts, cooked and cut into chunks {I used the breasts from a rotisserie chicken}
  • 1 cup broccoli, cut into tiny pieces and quickly steamed
  • salt and pepper 
DIRECTIONS:
To bake the potatoes, heat oven to 425 degrees.  Place potatoes on a foil-lined baking sheet and drizzle with some olive oil.  Poke holes all around potatoes with a fork and then season with coarse salt.  Bake in oven for 1 hour or until soft.
Once potatoes are cool enough to handle, cut an oval circle on the top of each potato and scoop out the inside of the potatoes into a bowl.  Be sure to leave about 1/8-inch thickness around the potato so it doesn't break.  
Add the butter, sour cream, 1/4 cup cheese, cut up chicken, and broccoli to the bowl with the scooped out potato flesh.  Season with salt and pepper as desired and stir to combine.  With a spoon, scoop mixture back into potato shells.  Don't be afraid to mound those potatoes high.  
Put back in oven and bake for about 10 minutes more or until heated through.  Sprinkle with remaining cheddar cheese and serve.  

Saturday, February 19, 2011

French Lemon Cream Tart...Yep it's amazing!!


Once again, the citrus is ruling my kitchen right now!  I'm trying to make the best use of the HUGE bag my mom gave me of lemons, limes, and oranges.  The kids are eating up the oranges like crazy, so that leaves lemons and limes of abundance!  
I've been eyeing this recipe for a few weeks now and figured I'd take the time to make it on Valentines Day.  The lemon cream filling is absolutely worth every minute spent stirring...trust me!  The shortbread-like crust looks very crumbly, but don't worry, with all of the butter in the crust, it comes together very nicely.  I especially liked the pat-in-the-pan style!  Next time I make this I may actually try a graham cracker crust.  Oh, and don't forget to make some whipped cream to go on top!  

THE MOST EXTRAORDINARY FRENCH LEMON CREAM TART
**Be sure to plan for refrigerating time of the cream and the dough**

Recipe adapted from Ezra Pound Cake  
Original recipe by Dori Greenspan "Baking: From My Home to Yours"

INGREDIENTS:
  • 1 cup sugar
  • grated zest of 3 lemons
  • 4 large eggs
  • 3/4 cup fresh lemon juice {from 4-5 lemons}
  • 2 sticks plus 5 tablespoons {10 1/2 ounces} unsalted butter, cut into Tbsp. size pieces, room temp.
  • 1 9-inch tart shell made with Sweet Tart Dough, fully baked and cooled {recipe below}
DIRECTIONS:

1.  Have an instant read thermometer, a strainer, and a blender at hand.  Bring a few inches of water to a simmer in the bottom of a double boiler or a regular saucepan.
2.  Put the sugar and zest in the top of a double boiler OR a large heatproof bowl that can be set over the pan of simmering water.  Off the heat, rub the sugar and zest between your fingers until the sugar is moist, grainy and very aromatic.
3.  Whisk in the eggs, followed by the lemon juice.  Set the bowl over the pan and whisk until the cream reaches 180 degrees F.  It will start to thicken and the whisk will leave tracks.  Getting to temp can take as long as 10 minutes.  {Mine stayed at 160 degrees for a while before it started climbing...be patient}
4.  Remove the cream from the heat and strain it into the blender; discard the zest in the strainer.  Check the temp of the cream again...you want it to be about 140 degrees.  
5.  Turn the blender to high and, with the machine going, add the butter about 5 pieces at a time.  Keep the machine going for another 3 minutes.  The cream will be nice and thick at this point.
6.  Pour the cream into a container, press a piece of plastic wrap against the surface to create an airtight seal and refrigerate for at least 4 hours or overnight.  
7.  To assemble the tart, whisk the cream to loosen it and spoon it into the tart shell.
**Refrigerate the assembled tart if not serving right away***

SWEET TART DOUGH

INGREDIENTS:
  • 1-1/2 cups all-purpose flour
  • 1/2 cup confectioner's sugar
  • 1/2 tsp. salt
  • 1 stick, plus 1 Tbsp. {9 tablespoons} very cold {or frozen} unsalted butter, cut into small pieces
  • 1 large egg yolk
DIRECTIONS:
1.  Put the flour, confectioner's sugar and salt in a food processor and pulse to combine {you can definitely do this by hand too}.  Add the butter and pulse until the butter is coarsely cut in-you should have some pieces the size of oatmeal flakes and some the size or peas.  Stir the yolk, and add it a little at a time, processing in long pulses, until the dough forms clumps.  Turn the dough out onto a work surface and, very lightly, knead the dough just to incorporate any dry ingredients.  
2.  Butter a 9-inch fluted tart pan with a removable bottom {I didn't have one, so I used a 9-inch pie pan}.  Whatever works!  Press the dough evenly over the bottom and up the sides of the pan. Freeze the crust for at least 30 minutes before baking.
3.  Preheat the oven to 375 degrees F.  Butter the shiny side of a piece of aluminum foil and fit the foil, buttered side down, tightly against the crust.  Put the tart pan on a baking sheet and bake the crust for 25 minutes.  Carefully removed the foil.  {If the crust has puffed, press it down with the back of a spoon}.  bake for another 8-10 minutes, or longer, until it is firm and golden brown.  Transfer the tart pan to a rack and cool the crust completely before filling.  

Ingredients for the lemon cream...don't be afraid of the butter!

Look at my little worker bee

I LOVE my new juicer!!

baked tart shell...I didn't have a tart pan, so I used my pie pan

Oh, this cream is soooo incredibly good!  

Finished product...not too shabby

Wednesday, February 16, 2011

Fettuccine Alfredo


This pasta has got to be one of my favorites, although it's also one that I try to stay away from.  It's usually loaded with cream and butter...a full-fat kind of meal.  Sometimes though, nothing else will satisfy but a big bowl of creamy pasta!  I tried to tweak things a little to make it somewhat of a "lighter" version.  From start to finish, it's probably a 15 minute meal.

Fettuccine Alfredo {my version}


INGREDIENTS: {Serves 4}

  • 1 lb. dried fettuccine noodles {I used linguine, because it's what I had on hand}
  • 3/4 cup heavy cream {you could also use milk, it just won't be as thick}
  • 6 Tbsp. unsalted butter
  • 1 1/2 cup freshly grated parmigiano reggiano cheese
  • salt and pepper to taste
  • 1 tsp. lemon zest
  • fresh parsley, chopped
DIRECTIONS:
  Bring water to boil in a large pot.  Add salt and noodles and cook according to package directions.  While noodles are cooking, melt butter in a large saucepan over medium-low heat.  Add cream and stir until sauce begins to thicken {about 3-5 minutes}.  You may need to lower heat so the sauce doesn't burn.  Add 1 cup of the parmigiano reggiano cheese and stir to incorporate.  Turn heat to low and add salt and pepper to taste.  
Once noodles are done, use tongs and lift noodles from the pot directly into the pan with the sauce.  The pasta water will actually help the sauce come together in the end, so don't worry about the noodles being too wet.  Stir noodles to combine and turn off heat.  Add lemon zest and the 1/2 cup of cheese.  Stir to combine.  Heap the pasta into a bowl and sprinkle with the fresh parsley.  Mange!

fresh cream, cheese, and butter

first the butter goes in...try not to burn it like I did!

Next the cream

Once the cream has thickened, add the cheese

This is when I start dipping the spoon in for a taste

Add the hot pasta straight from the pot

Tuesday, February 15, 2011

Lemon Mascarpone Mashed Potatoes


I hardly read the newspaper.  Mostly because of lack of time.  Anyway, on vacation this past weekend there were newspapers delivered to our door, so of course I picked one up and thumbed through it.  I came across the food section, which of course I automatically take interest in, and found two perfect recipes to make for a fun Valentines dinner.  These potatoes were very tasty!  At first I was a little hesitant to put lemon juice and zest in my mashed potatoes, but then I discovered that these weren't any ordinary mashed potato.  Surprisingly they were a hit with the kids too!  The picture above does not do them justice but take my word for it...they're delicious!  Oh, and I served them with steak, but I think they'd be great alongside chicken or fish too.

Lemon Mascarpone Mashed Potatoes 
{adapted from a recipe in the San Francisco Chronicle, Sunday Feb.13, 2011 edition}


INGREDIENTS: {serves 4-6}

  • 6-8 large yukon gold potatoes, peeled and cut into 2 inch chunks.
  • 3 Tbsp. extra virgin olive oil
  • 1/4 cup mascarpone cheese, room temperature
  • 4 Tbsp. unsalted butter
  • 3 Tbsp. fresh squeezed lemon juice
  • 2 tsp. lemon zest
  • sea salt and pepper to taste
DIRECTIONS:
  Cut potatoes into 2 inch chunks and place in large pot.  Cover potatoes with cold water, bring to boil, and reduce to a simmer.  Cook until a fork or knife goes through easily, about 15-20 minutes.  Drain; place back in warm pot, and mash with a potato masher.  Fold in the olive oil, mascarpone, butter, lemon juice and zest.  Taste and season with salt and pepper.  Serve immediately.

Monday, February 14, 2011

Happy Valentines Day

We spent the last four days in one of my favorite places, Lake Tahoe.  It was absolutely beautiful there...apparently the calm before the storm!  They are supposed to get a major storm this week, so I'm thrilled that we beat the storm.  I'm one of those fair-weather skiers...not the type who enjoys hitting the slopes when it's snowing.  I may have been more hard-core back in the day, but now that my three kids are taking up snow-boarding and skiing, it makes for a super exhausting day, even before I get a chance to take a run down the hill.  I guess those days of care-free skiing with my husband have officially come to an end...at least for the next 10 years or so.
Well, with Valentines day upon us, I thought I'd include in this post a list of some possible dinner or treat ideas for your sweeties.

Grilled Salmon with Meyer Lemon Compound Butter


Mini Lasagnas with sweet corn and mascarpone


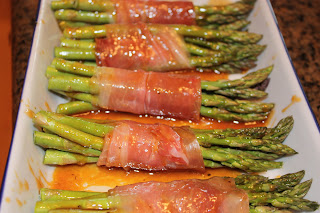
Prosciutto Wrapped Asparagus Bundles


Chocolate Espresso Cakes


Glazed Lemon Cookies

Tuesday, February 8, 2011

Glazed Lemon Cookies


There's a lot of citrus in our house right now and I'm trying my best to use what I can before they go bad.  I've been juicing a lot with my new juicer.  The kids LOVE when I make them fresh squeezed orange juice, but I don't want them to get too used to it!
I found this lemon cookie recipe on the Real Simple website...you can find it HERE.  Very simple recipe and I suppose if you wanted you could roll out the dough and cut into cute little hearts for your Valentine!

Glazed Lemon Cookies {slightly adapted recipe from Real Simple}


INGREDIENTS:

  • 3/4 cup {1 1/2 sticks} unsalted butter, room temperature
  • 3/4 cup granulated sugar
  • 2 large egg yolks
  • 3/4 tsp. vanilla extract
  • 1/2 tsp. grated lemon zest
  • 1/4 tsp. kosher salt
  • 1 3/4 to 2 cups all-purpose flour {I only used 1 3/4 cup flour}
For Glaze
  • 1 cup powdered sugar
  • 2 Tbsp. fresh squeezed lemon juice, more if necessary 
  • 1 tsp. grated lemon zest
DIRECTIONS:
With an electric mixer, beat the butter and granulated sugar until fluffy.  Add the egg yolk, vanilla, salt, lemon zest, and beat to combine.  Scrape sides often.  Gradually add the 1 3/4 cup flour, then little by little add the extra 1/4 cup flour only if needed.  **You don't want the dough to be too crumbly**.  Shape the dough into a 2 inch diameter log and wrap in parchment paper, or plastic wrap.  Refrigerate for 30 minutes, or until firm.  
Heat oven to 350 degrees.  Line a baking sheet with parchment paper.  Cut cookie log into about 1 inch slices and place about 1 1/2 inches apart on the lined baking sheet.  Bake for 16-20 minutes.  They do not need to be golden brown.  Let cool on baking sheet for 5 minutes, then transfer to cooling racks to cool completely.  
In a small bowl whisk together the lemon juice, lemon zest, and powdered sugar, until it forms a thick but pourable glaze.  Add more lemon juice or powdered sugar if necessary to get desired consistency.  Dip the top of each cookie into the glaze and let set, about 15 minutes.


I wasn't very picky about the dough being super round

The lemon glaze really makes these cookies!

Thursday, February 3, 2011

Grilled Salmon with Herb and Meyer Lemon Compound Butter


Don't let the recipe title fool you...this is an easy peasy recipe!  The salmon takes little effort to grill and the compound butter is a super simple thing that can even be made up a couple of days before you use it.
So, how does that sound? For those of you who are salmon lovers like we are, you will LOVE this dish!  I made some orzo pasta to set under the salmon and served a tasty-but-simple arugula salad.
We are super lucky to live down the street from our local fresh fish market, so I try to go for that any day over the store bought fish.  If you have the opportunity, try to buy wild caught salmon...it's good for you and the taste is incredible!  Oh, and don't feel like you need to find a meyer lemon, a regular lemon will work just fine!  Meyer lemons just have a little darker skin, almost orangish skin, and have a slightly sweeter lemony flavor.

Grilled Salmon with Herb and Meyer Lemon Compound Butter {adapted from HERE}

INGREDIENTS:

  • 1/2 stick butter, room temperature
  • 1 meyer lemon, zested {regular lemon will do just fine too}
  • 1 Tbsp. fresh thyme, finely chopped
  • 1 small clove garlic, minced
  • kosher salt
  • freshly ground black pepper
  • 4 {6 oz.} Salmon fillets with skin on
  • extra virgin olive oil
DIRECTIONS:
  In a small bowl, combine butter, zest, thyme, and garlic.  Mix everything well and season to taste with salt.  if using right away, keep at room temperature.  If making ahead, store in refrigerator, and bring to room temperature before serving.  
preheat grill to medium.  Let salmon come to room temperature first, then season with salt, pepper, and drizzle with olive oil.  Place salmon skin side down on preheated grill.  After 2-3 minutes, rotate the salmon 90 degrees.  Cook the salmon for another 3-4 minutes.  Turn the salmon over and cook for another 2-3 minutes.  Remove from the grill and top with the lemon compound butter.  The butter will act as a sauce and melt over and coast the grilled salmon.  I had some orzo pasta under the salmon and it made a yummy sauce for the pasta too!

Tuesday, February 1, 2011

Grilled and Stuffed Portobello Mushrooms with Gorgonzola


I'm seriously in love with these stuffed mushrooms!  They aren't just any ordinary stuffed mushroom...they are a main dish kind of mushroom.  The recipe comes from Giada at Home Cookbook (a birthday gift from my sis).  It makes six mushrooms, which is kind of a lot, so I bought four portobellos and piled a little extra filling into each one.  The kiddos didn't even want to try them, so I got to save two for lunch!  All you need is maybe a little salad to go on the side and your meal is complete!

Grilled and Stuffed Portobello Mushrooms with Gorgonzola {serves 6}


INGREDIENTS:

  • 1/4 cup plus 2 Tbsp. olive oil
  • 12 ounces turkey sausage, casings removed {I use Italian Chicken Sausage}
  • 2 garlic cloves, minced
  • 1/2 cup {4 ounces} mascarpone cheese, at room temp.
  • 2 Tbsp. fresh thyme leaves
  • 2 Tbsp. fresh oregano leaves
  • 3/4 cup plain dried bread crumbs
  • 1 cup {4 ounces} crumbled Gorgonzola cheese
  • Salt and freshly ground black pepper
  • 6 large portobello mushrooms, stems removed
DIRECTIONS:
  In a large skillet, heat 2 Tbsp. of the oil over medium-high heat.  Add the turkey sausage and cook, stirring frequently, until cooked through, about 5 minutes.  Add the garlic and cook for 1 minute.  Remove the pan from the heat.  Stir in the mascarpone cheese, thyme, oregano, bread crumbs, 1/2 cup of Gorgonzola, 1/2 tsp. salt, and 1/2 tsp. pepper.
Place a grill pan over medium-high heat or preheat a gas or charcoal grill.
Brush the mushrooms on both sides with the reaming 1/4 cup oil and season with salt and pepper.  Brill them stem side down, for 3 minutes.  Turn them over and grill the other sides for 2 minutes, or until tender.  
Fill the mushrooms with the sausage mixture and top with the remaining 1/2 cup Gorgonzola.  Grill them, stuffing side up, until the stuffing is warmed through, 5 to 7 minutes.  **I placed the stuffed mushrooms on a foil-lined baking dish and baked them in a pre-heated 375 degree oven for 7 minutes because they were getting kind of messy on the grill.  Enjoy!


LinkWithin

Related Posts with Thumbnails